

In our latest blog post, we walk you through the process of automating your daily news update with the Hackernews API. We’ll use n8n, a highly effective open-source workflow automation tool, to get the top trending Hackernews posts delivered straight to your inbox. Even if you’re new to n8n, we’ve got you covered with a quick and handy guide on how to get started with n8n cloud. Dive into our step-by-step tutorial to enhance your productivity and stay updated on the trending tech news with simple automation.
Hackernews Automation with n8n
The Hackernews API
There are basically 2 options for retrieving data from websites or services programmatically. Either you scrape the website, or you use an API. However, this must be offered by the provider, which is not always the case.
At Hackernews, we are lucky to have a public API that we can use without authorization. For our purposes, we use the Hackernews Algolia Search API to retrieve the top 10 posts of the day.
In the following, I will guide you through the necessary steps and queries, but if you want to make further queries, you can see the API documentation here.
The Workflow Scheduling Trigger
Before we can define the logic of the workflow and call the API, we need to define how and when the workflow should run. We use the trigger nodes in n8n for this. If you do not know how to define a trigger, have a look at this tutorial.
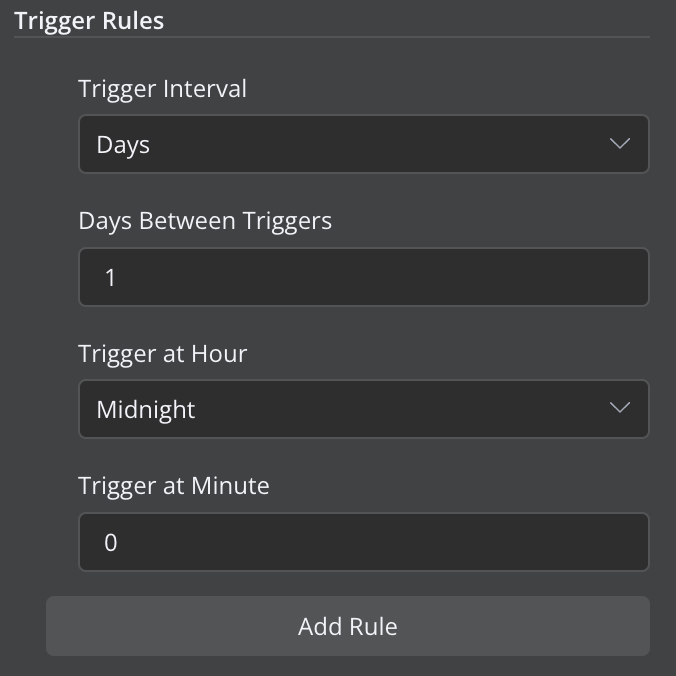
Since we want to run our workflow daily, we select the “On a schedule” node, select days as unit, 1 as interval, and the time you want.

The API Call
Once we have defined the regularity of our workflow, we now take care of the API call that is to be executed in each case.
If you don’t know how to make API calls with n8n, take a look at this tutorial.
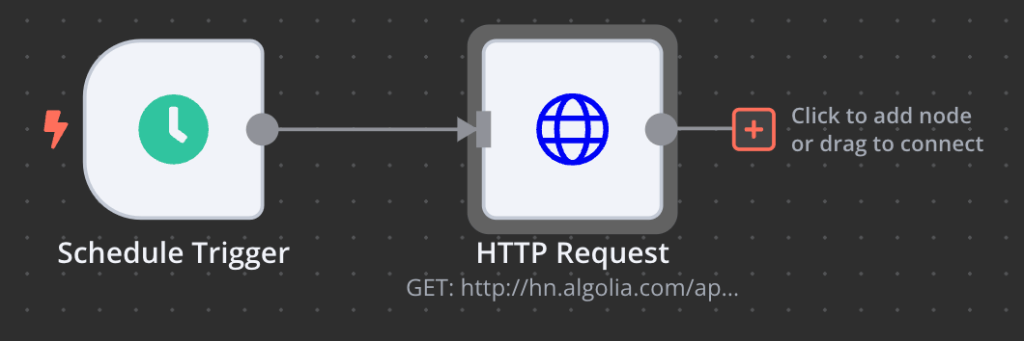
To define the next event in the workflow, we click on the plus to the right of our trigger node and then search for HTTP and select the respective node.
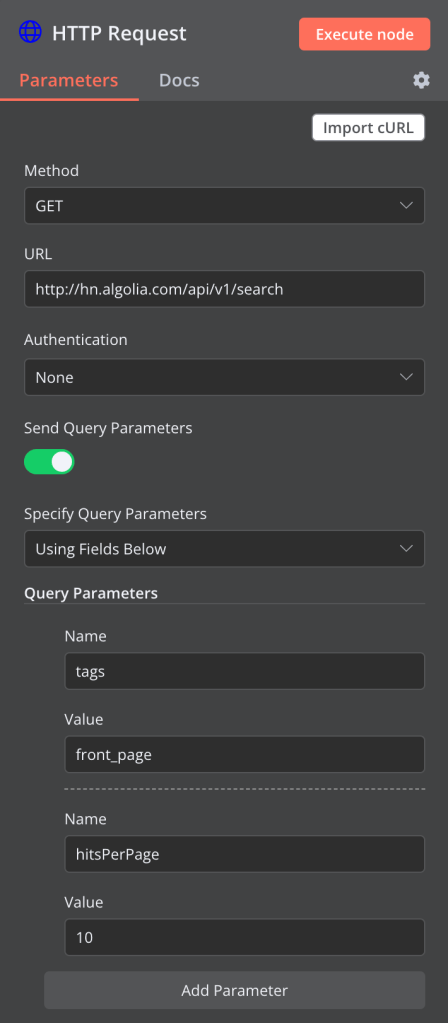
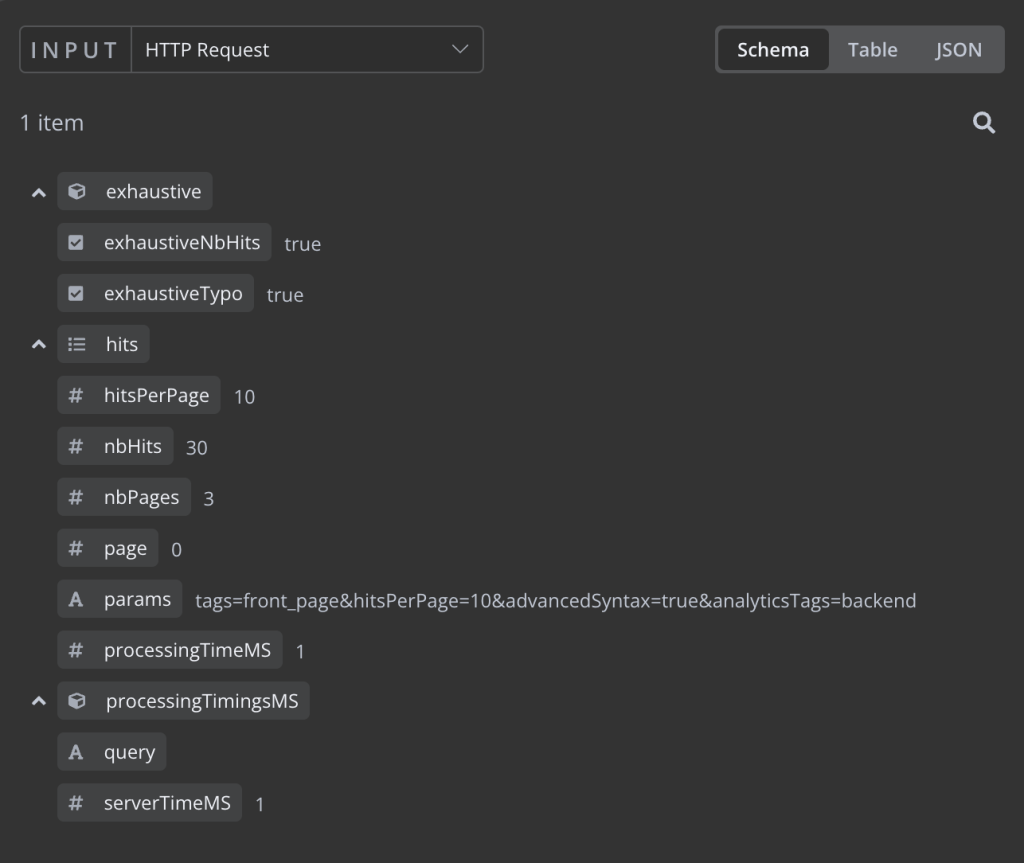
As already discussed, we use the Hackernews Algolia Search API to receive the top 10 posts from Hackernews every day. In order to only receive posts that are on the front page when queried, we use the tag “front_page” as the query parameter “tags” and because we want to limit the number to the top 10, we use the value “10” as the additional query parameter “limit”.
In the picture above you can see how you have to fill it in and copy the values.
At this point you can change the query according to what you want. This will only have a minor effect on the next steps. You can see exactly what other query parameters you can use in the API documentation.
Working With The Output Data
If you have already pressed “Execute” in your HTTP request, you will have seen that the output of the request is a large, heavily nested data point.
To subsequently send us the top 10 posts including headline, URL & author, we need to extract exactly this information and can leave the rest of the information aside.

To do this, we now use the “Item Lists” node from n8n.
With this you can do various things with your workflow data, such as combining several columns, removing duplicates or truncating rows.

In the first step, we want to split the large data point we have into individual data points per Hackernews post and only take the data that interests us into the next workflow step. To do this, we select the “Split Out Items” action.
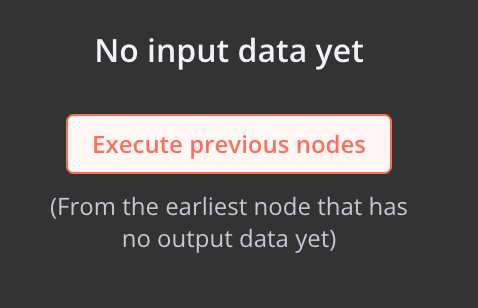
If you have not yet made an HTTP request, you will see on the left-hand side of your Item Lists node that you do not yet have any input data that we can work with. Although we can also define everything in writing in n8n, in most cases it is easier and quicker to do this using drag and drop. Therefore, you should now press “Execute Previous Nodes” on the left-hand side.
Now you can see the output data of the previous node (our HTTP Request to the Hackernews API) as the input data of the Item Lists node.
If you are familiar with n8n, you can already work with the data without the data engineering steps, these are just for convenience.

As the first step we split out the hits. You can do that bei dragging it from the Input fields, or just type it into the right field in the middle.
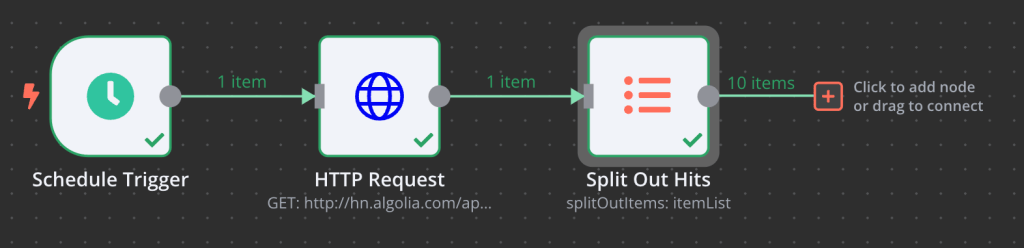
Now you should Press Execute again and go ahead with another Item Lists node at the right of the first one.

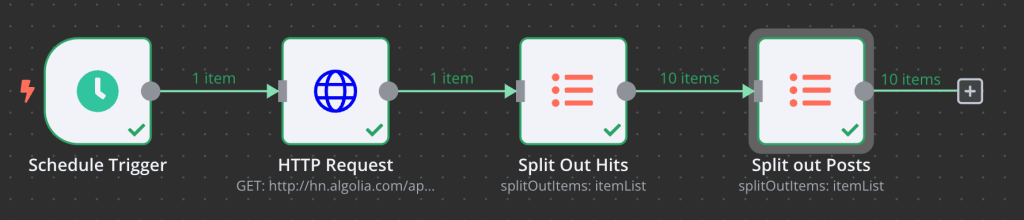
In the first step, we cut our large data point into our 10 posts. Now we only want to take the three data points per post that we really want to have in our mail. In our case, these are the title, the URL and the author. If, for example, you want to integrate the points or similar into your mail, you must also include this data here.
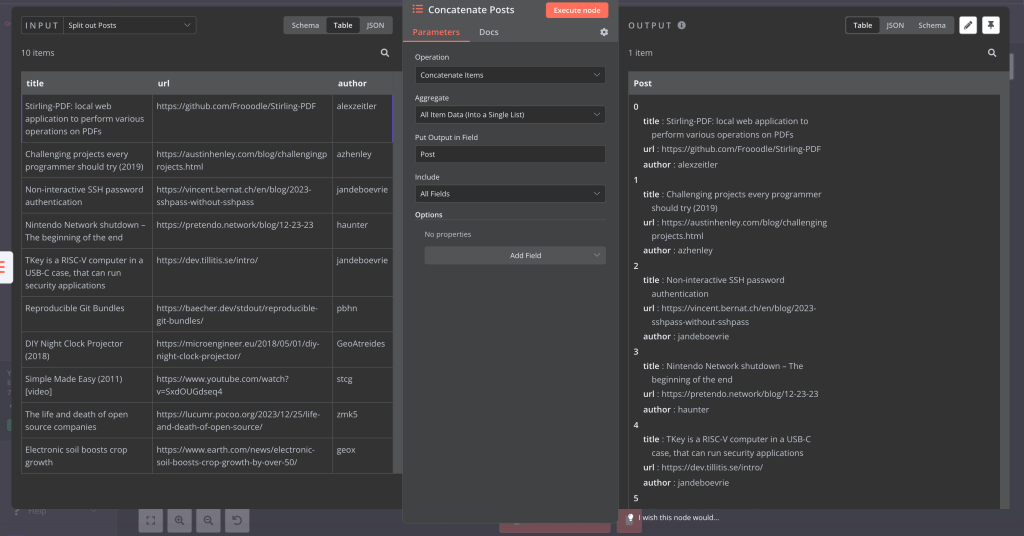
To subsequently send all our data in just one mail, and not as ten separate ones as it would be currently (because n8n performs every action for every data point), we add a third one after our second Item List node. This time, however, with the action “Concatenate Items”. We now aggregate all the data into a list and call this list (the output) “Post”.
If you now press Execute, the 10 data points become one again, but it is much clearer than before.
Next Steps: Sending Via Mail
In the next step, we can now send the extracted data to ourselves or to an e-mail list via a mail integration from n8n. If you have never worked with mails in n8n before, you can learn how to find and authorize the right integration for you in this guide.
For this example, I use the SMTP integration of n8n via the “Send Email” node.

First, select the authorization you have defined. Then you have to select the sending and receiving address. If you want to send the mail yourself via your authorized mail address, enter this mail address in both fields.
Now you can get creative with the title and content. If you want to include variables in a text, as I have done in this example, change the respective fields from “Fixed” to “Expression” and define these variables within 2 curved brackets.
If you have done everything up to this point as I have, you should be able to simply copy and paste my entries. It is important to pay attention to the correct naming of the variables and nodes.
In the subject, I include the date from our trigger node by using:
{{ $node["Schedule Trigger"].json["Readable date"] }}as I want my email to be provided with the current date.

You can expand the expression in the bottom right-hand corner to access additional functions. As you can see above, you have a real-time preview of the variables based on your input data and can automatically insert variables by clicking on the left-hand side.
In meinem Format nummeriere ich die verschiedenen Posts durch, setze die URL in Klammern und füge ein “by” vor den Autor ein.
1. {{ $json["Post"][0]["title"] }} ({{ $json["Post"][0]["url"] }}) by {{ $json["Post"][0]["author"] }}I then change this paragraph for each post. Simply replace the 0 with a 1, then 2, then 3 and so on.
Now you are ready to go, you can switch from the node view to your workflow and press “Execute workflow” at the bottom. Your workflow should now run smoothly. It’s best to check your e-mail inbox. If you now activate your workflow in the top right-hand corner, you will receive an email like this in your mailbox at the same time every day.
I hope you enjoyed the tutorial and were able to learn something. I am always happy if you recommend it to others or share it on social media.


Leave a comment